This guide assumes:
- the video is in one of these formats: mov, mp4, m4v or mkv.
- the file containing the video is located on the Windows computer or some storage device connected to the computer (memory card, USB flash drive, etc.) and NOT on a network drive or cloud storage (OneDrive, DropBox, etc.).
- the raw video will play back correctly without any errors or issues. If the video doesn’t play correctly (computer says a codec is missing, video plays with audio but only shows a black screen, etc.), stop and first try to optimize the video in PowerPoint, switching to a different computer to complete this process, or using your phone to edit & trim the video.
- you know the start and end times for the final trimmed version of the video.
- you are aware of any file data size requirement or restriction required by the project (not to be confused with a time requirement or restriction).
- you are using a Windows 10 computer with PowerPoint and Photo applications installed.
Trim video – Windows OS
Most Windows computers come with an application called Photos. Right click on the video file and select Open with –> Photos. The video should appear and playback normally. If so, click on the pencil and paintbrush icons at the top of the window and select Trim.

A timeline will appear with white circles on the far left and right sides representing the start and end times of the video. Click and drag on the white circles to modify the beginning and end of the video timeline.

Once the adjusted timeline is set the way you want it, click Save As located at the top of the window. Give the new file a unique name to note differences from the original and be sure to save it in a familiar location.
If your project has a file size requirement or limitation, the easiest thing to do while still in the Photos application is to open the menu in the top right corner of the screen and select File info.
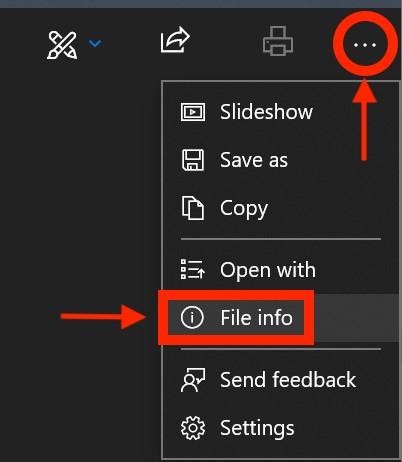
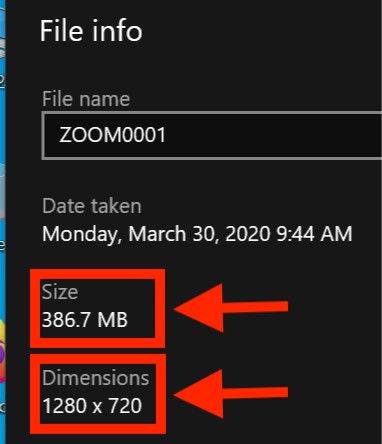
This will display the data size for the video file and the frame dimensions. For example, in the screenshot below the format shows the data size is 386.7 MB and the frame dimensions are 1280X720.
This video (without audio) summarizes all of the steps above:
Compress & optimize video – Windows OS
If the video needs compressed to significantly reduce the file data size and/or optimized to playback correctly on your computer, then do the following on a Windows 10 computer with Microsoft PowerPoint installed:
- Open PowerPoint
- Select a new blank presentation
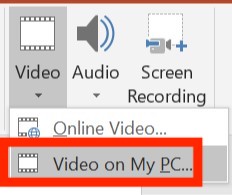
- Insert the video by dragging and dropping the file into the slide (easiest method) OR select Insert (a tab located at the top near the menu list) and, depending on your version of PowerPoint, click on Media and/or Video (either choice is a button located on right side of the top ribbon). Then click –> Video on My PC and select the video file.
Be patient during the import process, look for the progress bar at the bottom of the window indicating status.

After the video file is imported into PowerPoint, click on the File menu (some versions of PowerPoint also require you to then click on the Info tab) and select Compress Media –> Standard (480p).
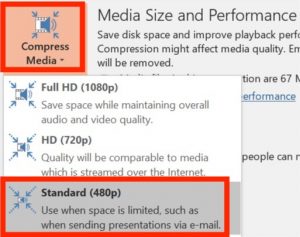
When the compression process is completed, close the window and return to the PowerPoint slide. Then right click on the video and select Save media as… Give the new file a compatible name (see link for info) and note the saved location.

This video (without audio) summarizes all of the steps in this section:
