
The following assumes:
- the video is in one of these formats: mov, mp4, m4v or mkv.
- the file containing the video is located on the Mac computer or some storage device connected to the computer (memory card, USB flash drive, etc.) and NOT on a network drive or cloud storage (OneDrive, DropBox, etc.).
- the video will playback correctly without any errors or issues on the computer.
- you know the start and end times for the final trimmed version of the video.
- you are aware of any file size requirement or limitation associated with the project. (not to be confused with a time requirement or restriction).
- you are using a Mac computer with Quicktime installed.
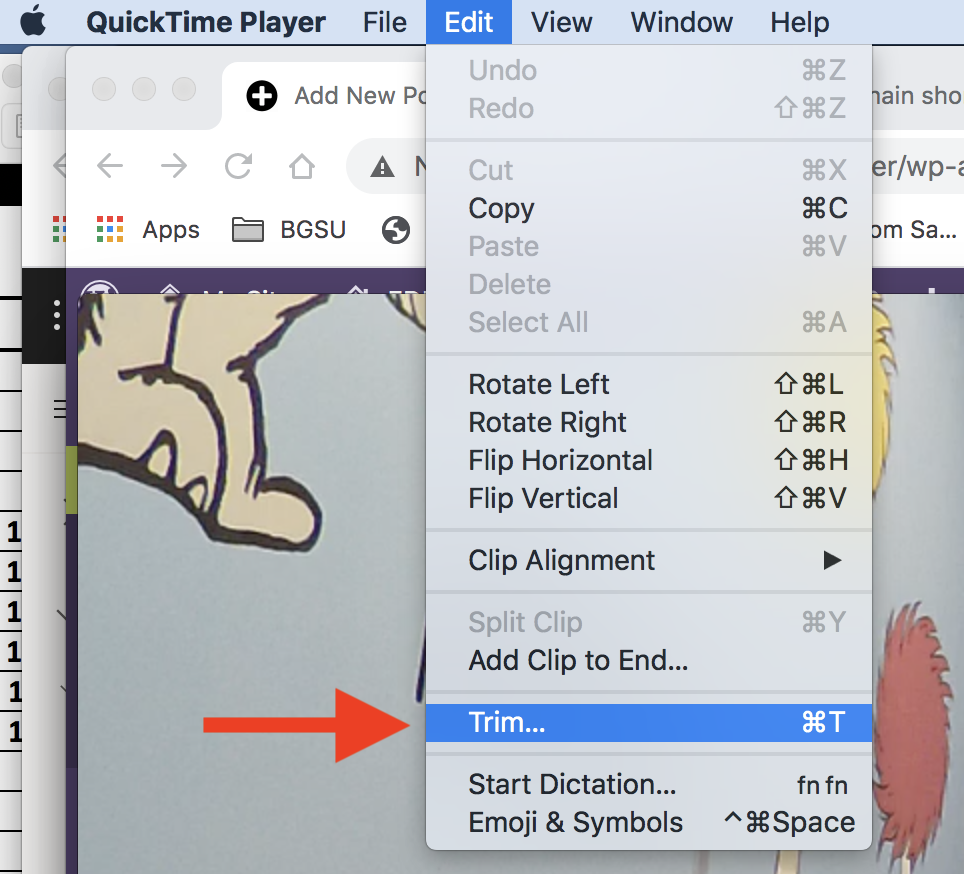
All Macs come with Quicktime installed in the Applications folder. Open it and then open the video you want to trim in Quicktime. Click on the Edit menu at the top of the screen and select Trim…
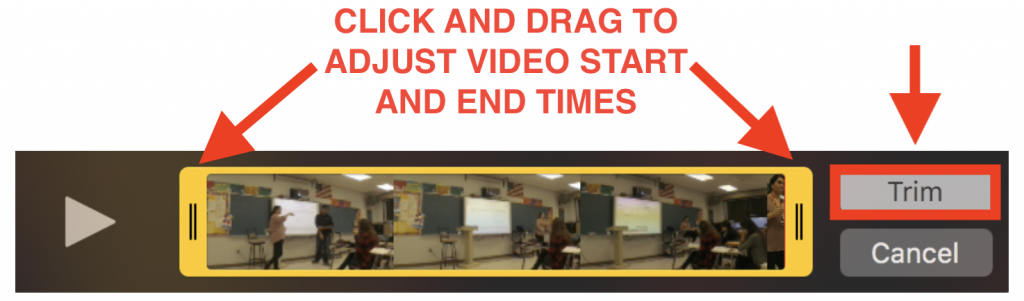
This will open the timeline at the bottom of the window with a yellow rectangle around it. Click and drag on the beginning and/or end of the yellow rectangle to adjust the video start and stop times. Click the Trim button to make the selected changes to the timeline.
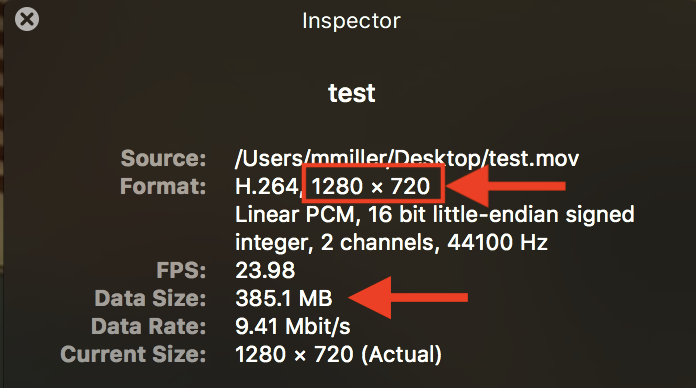
If your project has a file size requirement or limitation, click on the menu at the top called Window and select Show Movie Inspector. This will display the format and data size for the video file. For example, in the screenshot below the format shows the frame dimensions as 1280X720 and data size is 385.1 MB.
If you DO NOT need to compress the video to significantly reduce the file size, select Save from the File menu and give the new file a compatible name (see link for info) to note changes from the original file.
If the video needs to be compressed to significantly reduce file size and BOTH frame dimensions are greater than 480, select from the File menu Export..480p. Give the new file a compatible name (see link for info) to note changes from the original file.
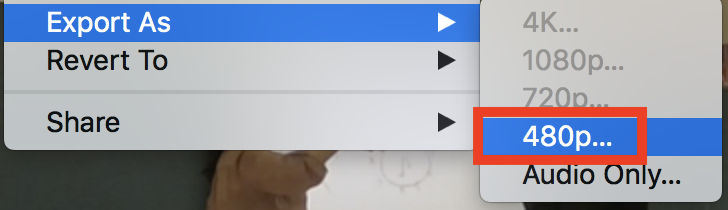
If one of the frame dimensions is already 480 or less, you may need to use an alternate application for compression to significantly reduce the file size such as Shotcut.
This video (without audio) summarizes the steps in this post including video compression and file export.