
This guide will cover three possible situations in Sections A, B, and C that require something in a video to be blurred out. This is listed in order of complexity and each additional section builds upon steps in the previous one. So, if you need the results described in Section C, you must first complete Sections A & B. Section D covers exporting the final product out of Shotcut as a video file that can be saved to your computer.
This guide assumes:
- the video plays without any issue. If the video doesn’t playback correctly (computer says a codec is missing, video plays with audio but only shows a black screen, etc.), stop and first try to optimize the video in PowerPoint, switching to a different computer to complete this process, or using your phone to edit & trim the video.
- the video timeline has been trimmed to meet length requirements for the final product.
- the video file has been compressed to meet data size requirements for the final product.
- you are using a Mac or Windows computer with the application Shotcut installed. If you need to install Shotcut, use the appropriate link below. If you do not know how to install software on your computer OR do not have administrator rights for the computer, stop and find help to proceed.
- Apple Mac OS 10.10+ –> DOWNLOAD
- Microsoft Windows 64 bit portable zip –> DOWNLOAD . Open the Shotcut folder and open the Shotcut application. When prompted, Extract all and select a destination. When extract is completed, open the newly created Shotcut folder and open the Shotcut application.
- NOTE: if you are a BGSU employee using a Windows office computer, Shotcut is available in Software Center and does not require administrator access for installation.
Section A: A fixed portion of the image needs blurred out for the entire duration of the video. Some examples would be to conceal a sign, name on a jersey, a student sitting relatively still in a seat, or names shown during a screen recording of Google Meet.
Section B: A fixed portion of the image frame needs blurred out only during some parts of the video timeline. Examples: a student comes in/out of frame to write something on the board, someone unexpectedly enters the room in the background, or some identifying text (school name) is shown during a presentation.
Section C: A person or object moving across different parts of the screen needs to be blurred out. Perhaps the camera is moving and/or the person/object is moving.
Section D: Exporting the modified video as a file that can be saved to your computer and then submitted or distributed to others.
Section A: Anchored blur for entire video
- Open the Shotcut application and insert the video file into Shotcut: Drag and drop the file into the open Shotcut window OR while in Shotcut select File Menu –> Open and select the video file.
- From the top of the window, click on the Filters icon. This will open a new panel on the left side of the screen for the filter settings.
- Click on the “+” button and the Video tab to get to the relevant filters list.
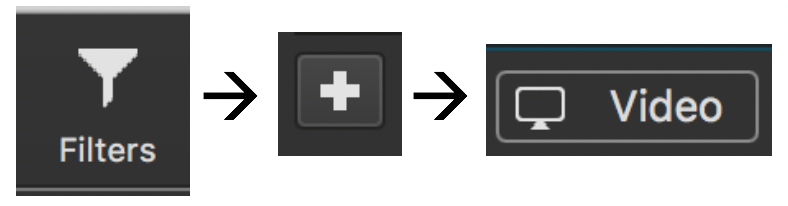
- Scroll down the alphabetized list and select Spot Remover. This will insert a small moveable blur box into the top left corner of the video. Click and drag it to the portion of the frame that needs blurred out. Expand and resize to cover whatever needs to be concealed for the entire duration of the video.
The video below (without sound) summarizes the content of Section A. In this example we want to blur out the items on the yellow bulletin board along the left side. The camera for the video is stationary and we can leave the Spot Remover blur filter in place for the entire length of the video.
If the steps above cover all the things in your video that need blurred out, go to the export section at the bottom of this guide. If additional items need blurred out for the entire video, repeat steps 3 & 4 or proceed to section below as needed.
Section B: Anchored blur for portions of the video timeline
This section assumes you know when you want a blur to occur during the video and have noted the exact times (minutes and seconds) when this needs to be added and removed.
First, complete steps 1-4 of the section above and make sure the Spot Remover filter is selected before moving on.
Refer to the image below to identify items and complete the following:
- Click the Keyframes tab located in the bottom left corner to reveal the Keyframes timeline (this may already be selected for you).
- Click the button at the top of the Keyframes panel that will zoom to fit the timeline within the current view.
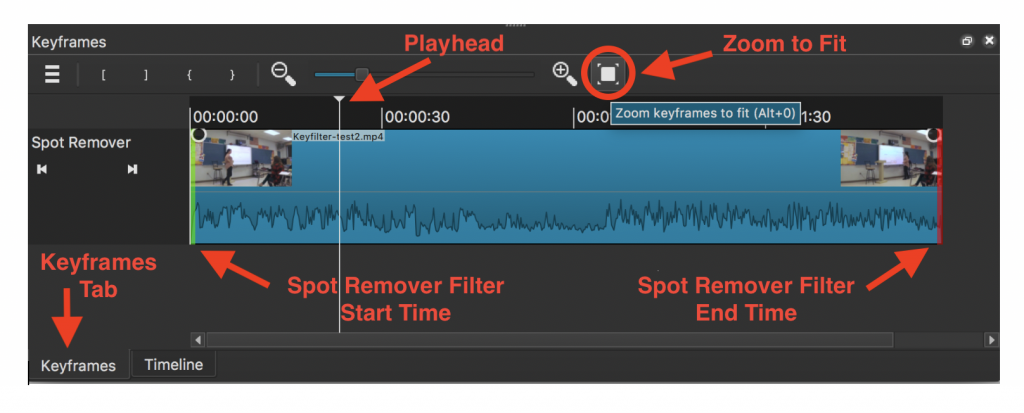
- Click and drag the green bar at the beginning of the timeline to indicate when the blur must start. Click and drag the red bar at the end of the timeline to indicate the when the blur must end.
The image below is an example of the Spot Remover setting for a blur starting in the video timeline at 30 seconds (green line) and ending at 1 minute (red line).

The video below (without sound) summarizes the content of Section B. In this example we will blur out the face of a student who comes up to write on the Smartboard. They enter and leave the frame from the right side. The camera is stationary allowing us to insert a rectangle shaped Spot Remover blur filter to conceal their identity. This filter is only used during the brief time the student is on screen.
If the steps above cover all the things in your video that need blurred out, go to the export section at the bottom of this guide. If additional items need blurred out intermittently during the video, repeat steps 3, 4, & 5 or proceed to the section below as needed.
Section C: Blur with manual tracking
With steps 1-5 completed, we can now use keyframes to adjust the position and size of the Spot Remover filter at designated points in the timeline. Watch the video for info (note: video has no audio, just images).
Exporting video from Shotcut
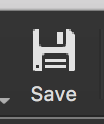
When everything is setup to blur all content in the video the way you want it, save the Shotcut project file in case you need to make changes in the future. This will create a file read only by the Shotcut application and not intended as a stand alone video file for distribution. Give the new file a unique name and note the saved location.
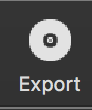
Then click on the Export button at the top of the screen.
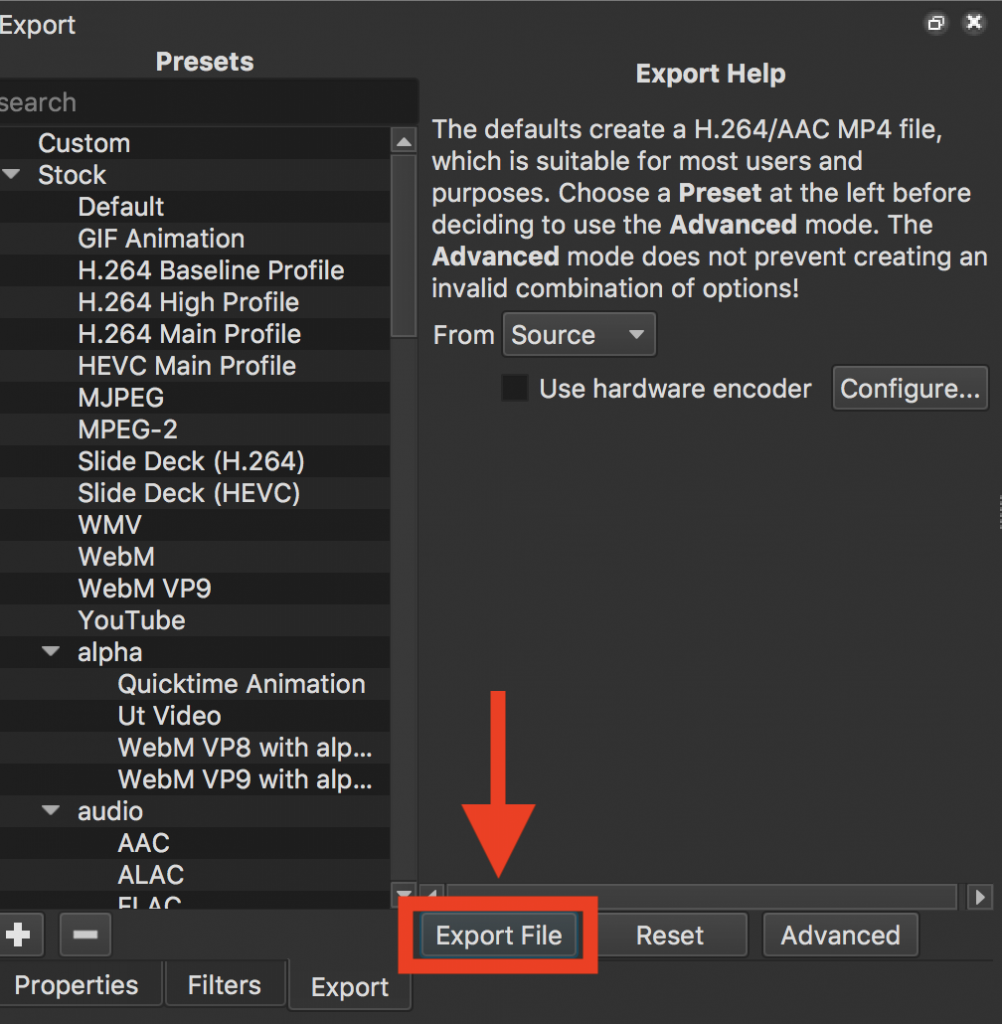
This will open the Export settings window on the left side of the screen. Do not make any changes to the presets or configuration – leave it all as is. Click the button named “Export File” highlighted below.
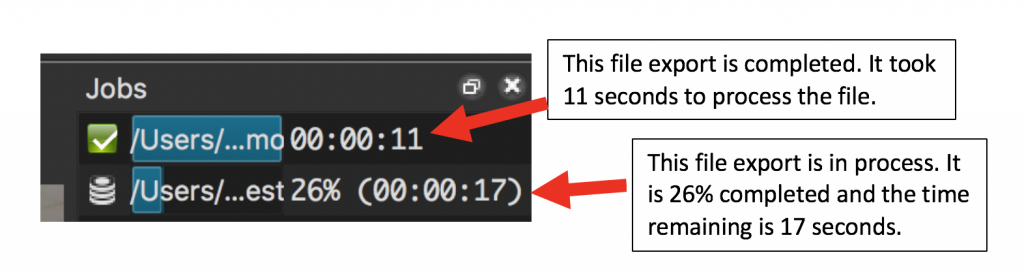
Give the new file a compatible name (see linked info) and note the saved location. The video is processed to insert the blur while saving. This process will take time and can vary greatly among projects. The save status is indicated on the top right side of the screen. Be patient and do not interrupt this process until completed.
When the export is done, you can distribute or submit this new video file as needed.