Assignment 1 – August 31, 2010
Posted in VCT460 on August 31st, 2010 by Gillian HansonPart 1:
For Part One to straightened the image I used to ruler tool. The ruler tool is found under the eye dropper tool. I used the ruler tool to make a line parallel with the horizon. After that the option to “straighten” was available at the top. This straightened the image.


Part 2:
To correct the perspective of these photos I first used the crop tool. Once I had the crop selected I was able to click the option for perspective. The perspective option allowed me to move each corner of the crop box individually to align the crop box correctly with the corners of the wall painting.
Part 3:
For this part I first selected the car by using the magnetic lasso tool, and refined the edges to make my selection look more realistic. I converted my selection to a smart object to avoid it being a destructive transformation. After that I choose my background. I placed my smart object on the background and resized it to look more realistic. I duplicated the smart object (car) changed the color, and rotated the image to make it look like another car. I also used the burn tool and made the second car look darker than the car in the foreground.
Part 4:
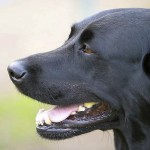
I first corrected the dog photo to look more like the corrected photo. I used various options while in the photoshop raw mode. The first photo is the origianl file I was given to adjust. The second photo is MY adjusted photo. And the third photo is the photo in which mine was to be modeled after. The objective was to get Photo 1 to look like Photo 3. Photo 2 is my final piece.


I used the same technique for the car photo as I did to make my final image. I used magnetic lasso and refined the edges, than combined the photos and made minor adjustment to make the photo look more realistic.
Have a great day!


