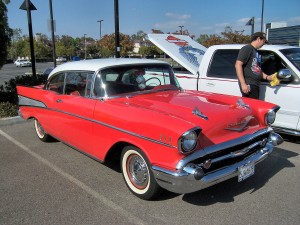
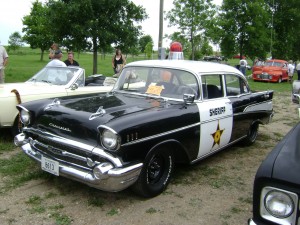
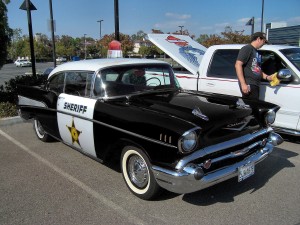
In Class Assignment #4- September 28, 2010
My first step was to take the siren and transfer it. It was relatively easy to just to select it in quickmask mode with the paint brush tool, then just copy and paste it, shrink it, and adjust it to the new image.
Next I did the same selection method for the door. I copy and pasted it into the new image then reflected it horizontally, and adjusted it for size. I then used the Transform>Warp tool to do the fine tuning adjustments to get the door to correctly fit over the old door. I also used the perspective crop option on the word “Sheriff” so that it would not be backwards on the new image. I then copy and pasted into the new image, then used Transform>Perspective to change the perspective to fit the car. I then transformed it for size and rotation to look right on the door.
I used the clone stamp tool to get rid of the dice, and to get rid of the lamp-post reflection on the roof of the car.
Lastly, I used a black and white Adjustment layer and left everything that was red, black. I then fine tuned with the paint brush on the adjustment layer to bring back the color of everything else on the car (chrome, headlights, etc.). Then I duplicated the adjustment layer and set it to “Multiply” then lowered the opacity some for a better shiny-black-car look.
Bazinga.
-ZMO


