VCT4600 In-Class Assignment 4
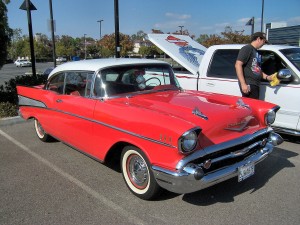
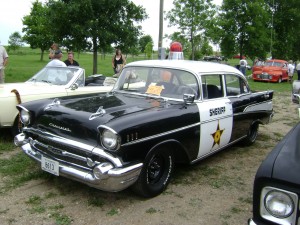
For this assignment I had to adjust one image of a red car to make it look like the police car from another image. Here are the original images:
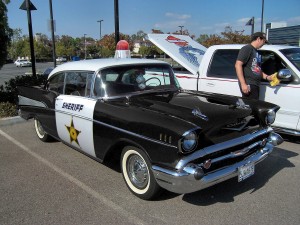
And here is my adjusted image:
There were a lot of steps I had to take in order to make it look like the police car of image 2. The first thing I did was to change the car’s color from red to black. I did this by making a rough selection of the car with the polygonal lasso tool, but avoiding the red detailing of the truck behind it. Then I went to Image > Adjustments > Hue/Saturation. I changed the settings from Master to Reds, then brought the Lightness down all the way to -100. This changed all the red in the selection to black. I also had to bring down the lightness of Magenta tones as well to get rid of all the red. I wasn’t quite yet happy though with car color, as it was a bit more grey than black. So while the car was still selected, I went to Image > Adjustments > Levels, & moved the left handle slightly to the right until I liked the tone of the blacks.
After I was got rid of all the red of the car, I moved on to taking elements from the original police car image & moving them to my own. I started with the white door. I selected it with the polygonal lasso tool, copied it, then pasted it into the image I was working on on a new layer. Since it was backwards, I had to flip it, but before that I had to copy the word ‘sheriff’ from the door & paste it on a new layer so I could replace it later. Once I flipped the door the right way, I used the Warp function to make the door fit to the new car. After this I replaced the word ‘sheriff’ back on the door, & used the Perspective function to reverse the perspective. I used layer masks & the brush tool to make slight corrections along both the door and word in order to blend them correctly.
The last thing I did was to select the police light from the top of the car & paste it as a new layer on my working image. I used the rotate and scale tools to make the light the right size & angle, then again used a layer mask & brush tool to blend the bottom of the light against the top of the car. When finished I flattened the entire image & saved it was a jpeg.


